A practical guide to customer onboarding within Confluence
The first step in making your customers feel welcome is creating a strong onboarding strategy.
In the onboarding process of customers, there are many ways to get them started. Watching a quick demo and reading docs are very useful. But what if you give them a whole learning platform where you deliver a set of courses about your products or services.
Smart Courses for Confluence is a tool that transforms your Confluence wiki into an eLearning platform. You can build learning materials, interactively guide users through the information, and track learning results in real-time for some of them.
Through this blog post, you will learn how to create onboarding courses for Confluence users and even anonymous ones.
Set permission for anonymous access
Confluence has this cool feature that lets anonymous users access spaces. You just have to enable anonymous access from the space permissions.
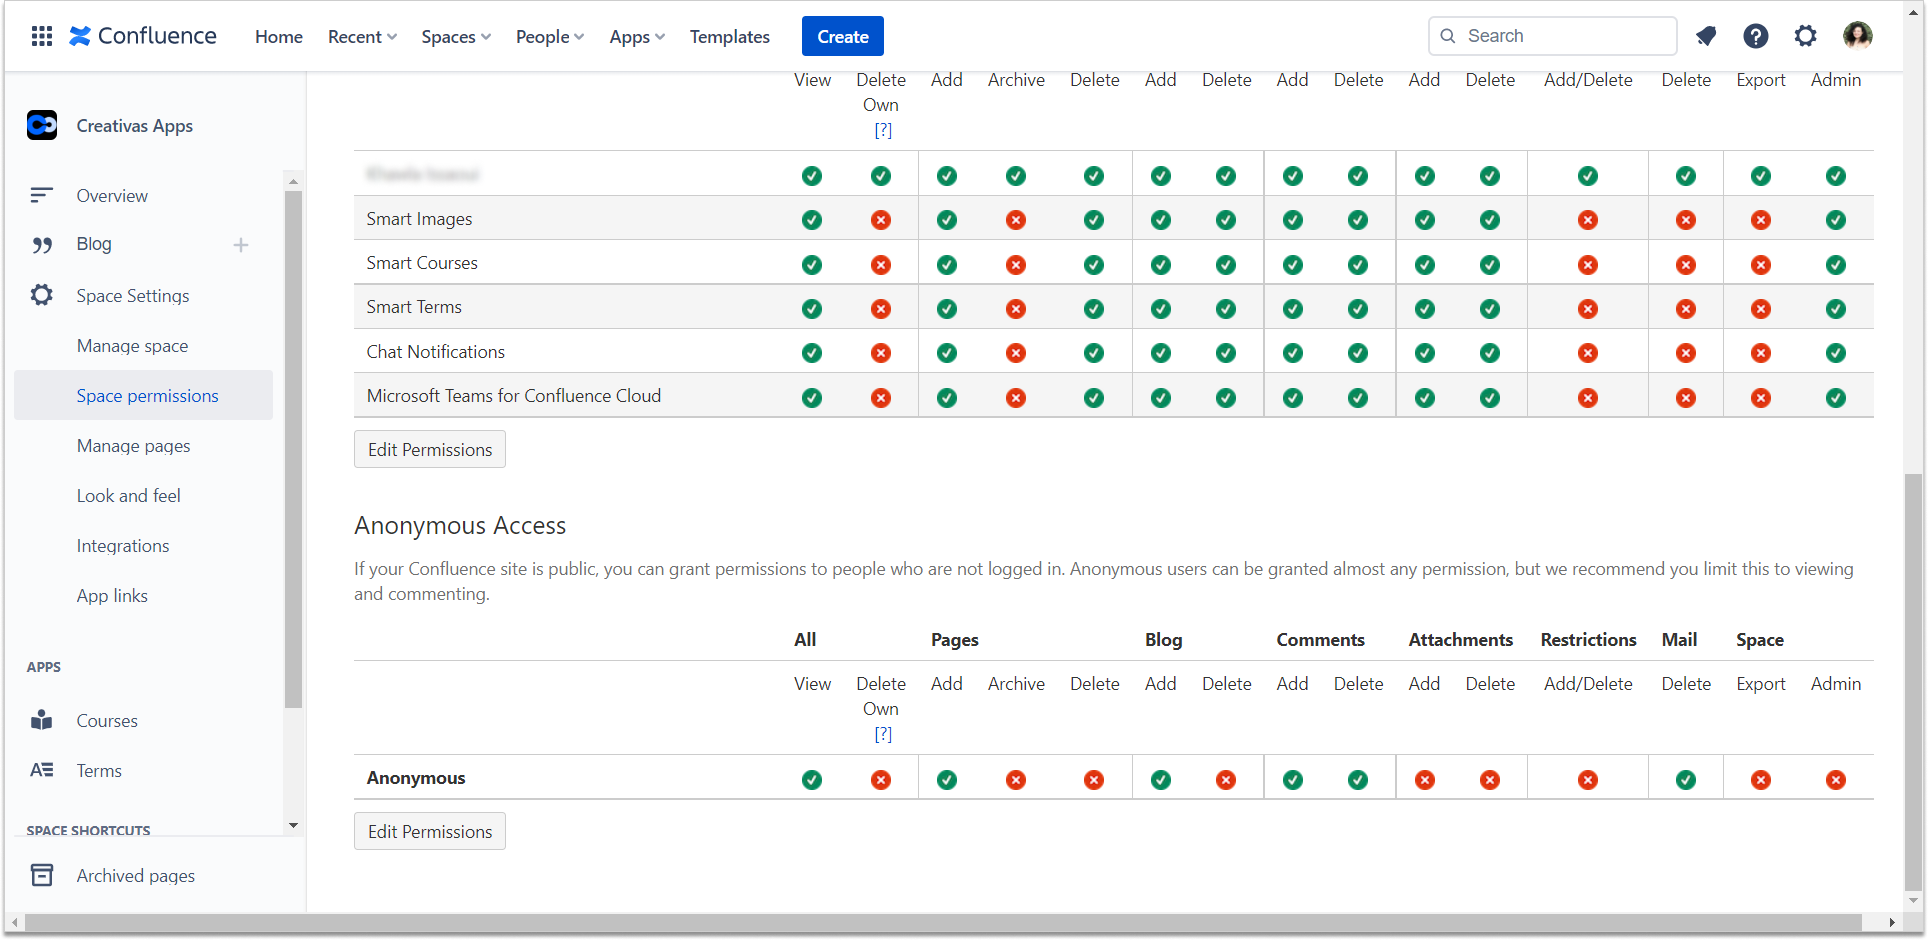
Smart Courses as well supports that accordingly. That means your customers have access to the courses pre-made in that space. However, since they are anonymous, you can’t track their sessions, metrics, and learning path like you do for licensed users in Confluence.
We, as Creativas, thought this was a great opportunity to onboard our customers by giving them access to pre-made courses about our products.
But wait! These courses are not just documentation.
We learned that the real goal of onboarding isn’t to get them ready for your product but to keep them engaged with it. So, we gathered all the possible different resources from our website and Youtube channel along with personalized explanatory videos made especially for our clients.
Check this Confluence space to view these courses and finish reading to see how we created them along with the space customization.
Customize your space catalog
Smart Courses for Confluence enables you to customize your learning platform whether globally or per space. Our recent blog post “Customize your learning management system” explained how to do that globally. However, in this one, we will look at how to customize it per space.
There are some differences between the course catalog global configuration and the space catalog configuration. Take into consideration that only Confluence admins and Smart Courses admins have access to the app global configuration while in the space configuration, space admins have the permissions to access it as well.


Create a course in a few steps
What do you think are the most important first steps to do in creating your course?
Well, let us tell you!
After hitting the New course button, the first thing you have to do is choose a space.
While you are in the course editor, the thumbnail, title, and “about the course” are actually mandatory and should not be skipped. They give an overview of the course in the catalog.
After that, start building your course by adding different content. The course can contain as many sections as you like and the cool part is that you can collapse them to give a clear look at the course; especially when it is a bit long so that the attendee knows what to expect. These sections can also hold all different types of capsules.


As a course creator or contributor, you have a rich configuration that contributes to a more customized course. According to the screenshot below, the configuration is re-formed to be more organized now. It gives a more comprehensive look.