How to export & import training courses in Confluence space
Creating training material requires a domain expert or someone aware and acknowledged of the training subject. Some companies hire experts to do so, some create their own courses in Confluence as they don’t need heavy content, and others just give this mission to a training consultant as it is not something that could be done internally.
Using Smart Courses for Confluence, you’ll be able to create courses in Confluence without using a third-party app, which could facilitate the process of moving courses from one instance to another.
But how to move these courses from one Confluence instance to another?
Scenario
E-learning consultants deal with several companies simultaneously; each has its own specific needs, which means customized courses. The consultant will create a space for the company on his instance and create a complete group of courses in Confluence under the same catalog. Depending on the company, they can even customize the logo, the branding, and the course catalog announcement.
Solution
After approval, the consultant will export these courses in Confluence and send them to the company’s Confluence site admin to import them into their instance. But, to export these courses, you’ll have to export the whole Confluence space they’re created in.
You’ll find the steps for Cloud below.
How to export courses in Coufluence with few steps? Export a space
You need the ‘Export Space’ permission to use the space export functionality.
Open your wiki and open the space you want to export.
Go to space settings.
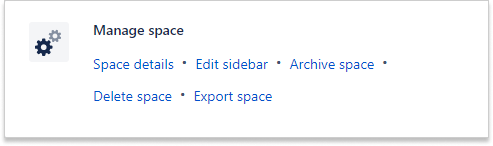
Choose Export Space in Manage space.
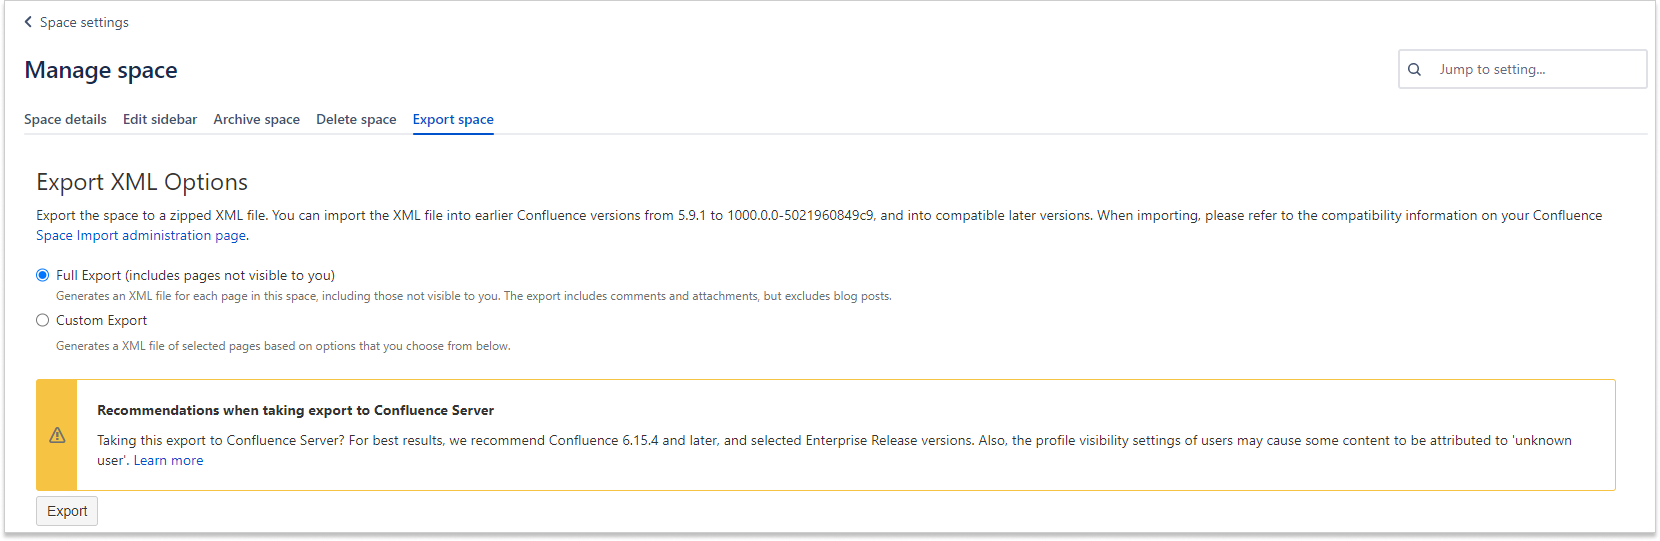
Click on XML since it’s the only supported format that can be imported into Confluence.

After that, choose full export or custom your export by choosing which content you need in the export file, and push the Export button.
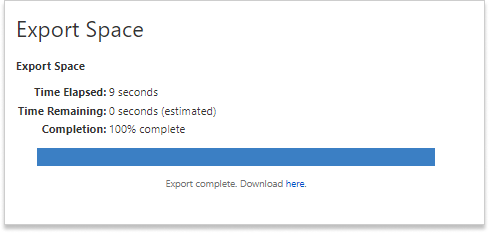
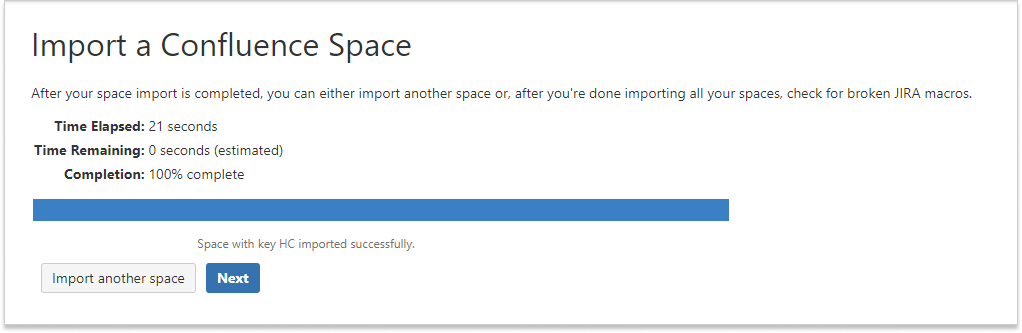
After finishing the export, download the file. It will be automatically downloaded in a zip format.
Please note that in Smart Courses for Confluence, the added Confluence pages’ capsules within the course will not appear after you import the space. You just have to re-insert them in the course or use the text capsule to avoid any permission misconception.
How to import courses in Confluence? Import a Space Import
You need to be a Confluence Admin or a Site Admin to import a space.
Click the⚙️settings in the Confluence navigation bar.
Type Ctrl+F to search by keyword for “Import Spaces”.

Once you find it, click it and select the file you’re willing to import.
Choose the Cloud project you’d like to link to this space if you’re using Jira Cloud.
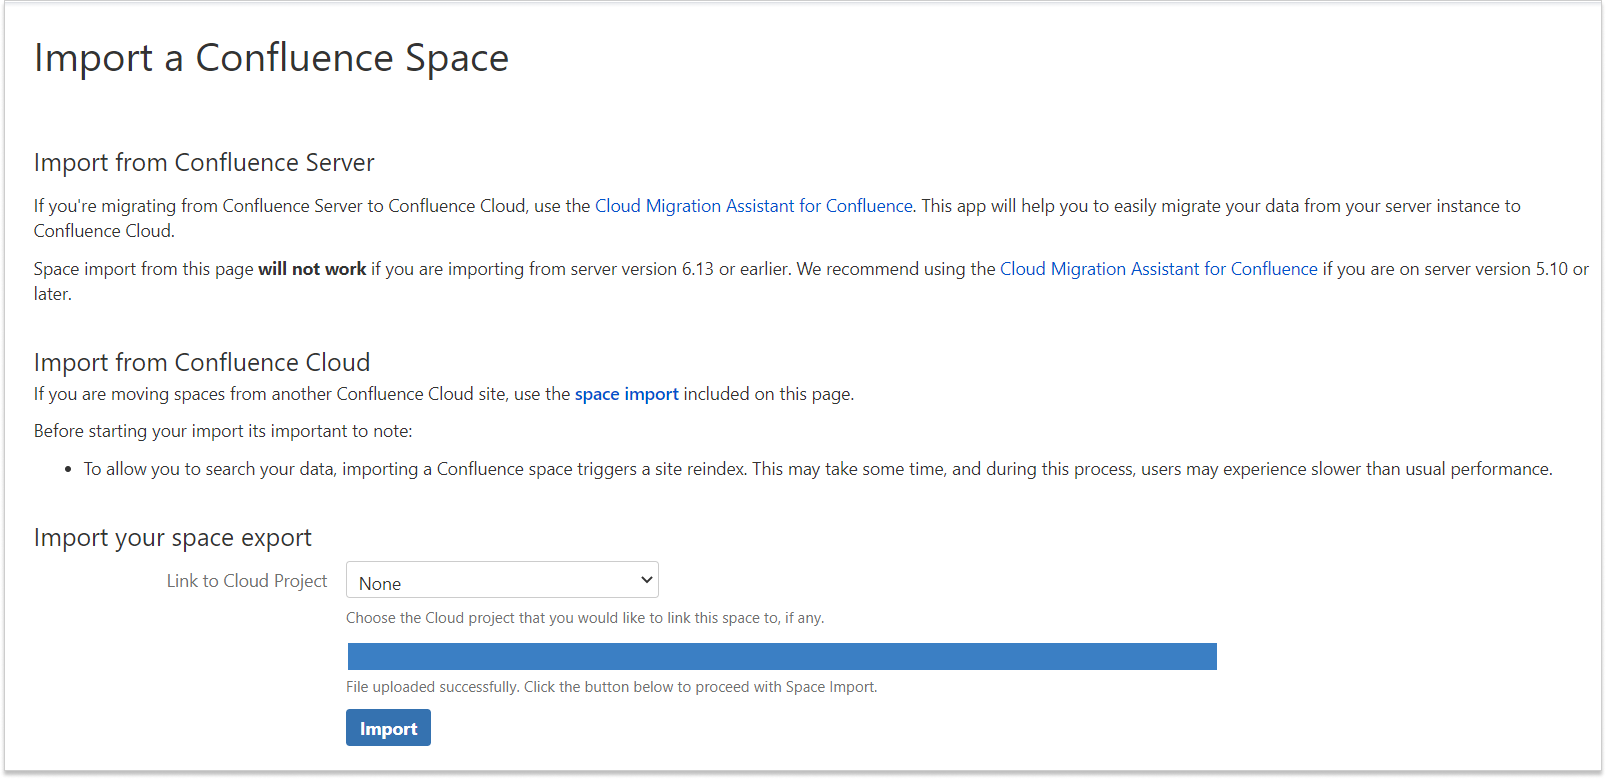
Select Import, and voilà!
⚠️When you import a space, make sure there’s no similar space key to the one you’re importing.
Read this article to find out more about importing a space.
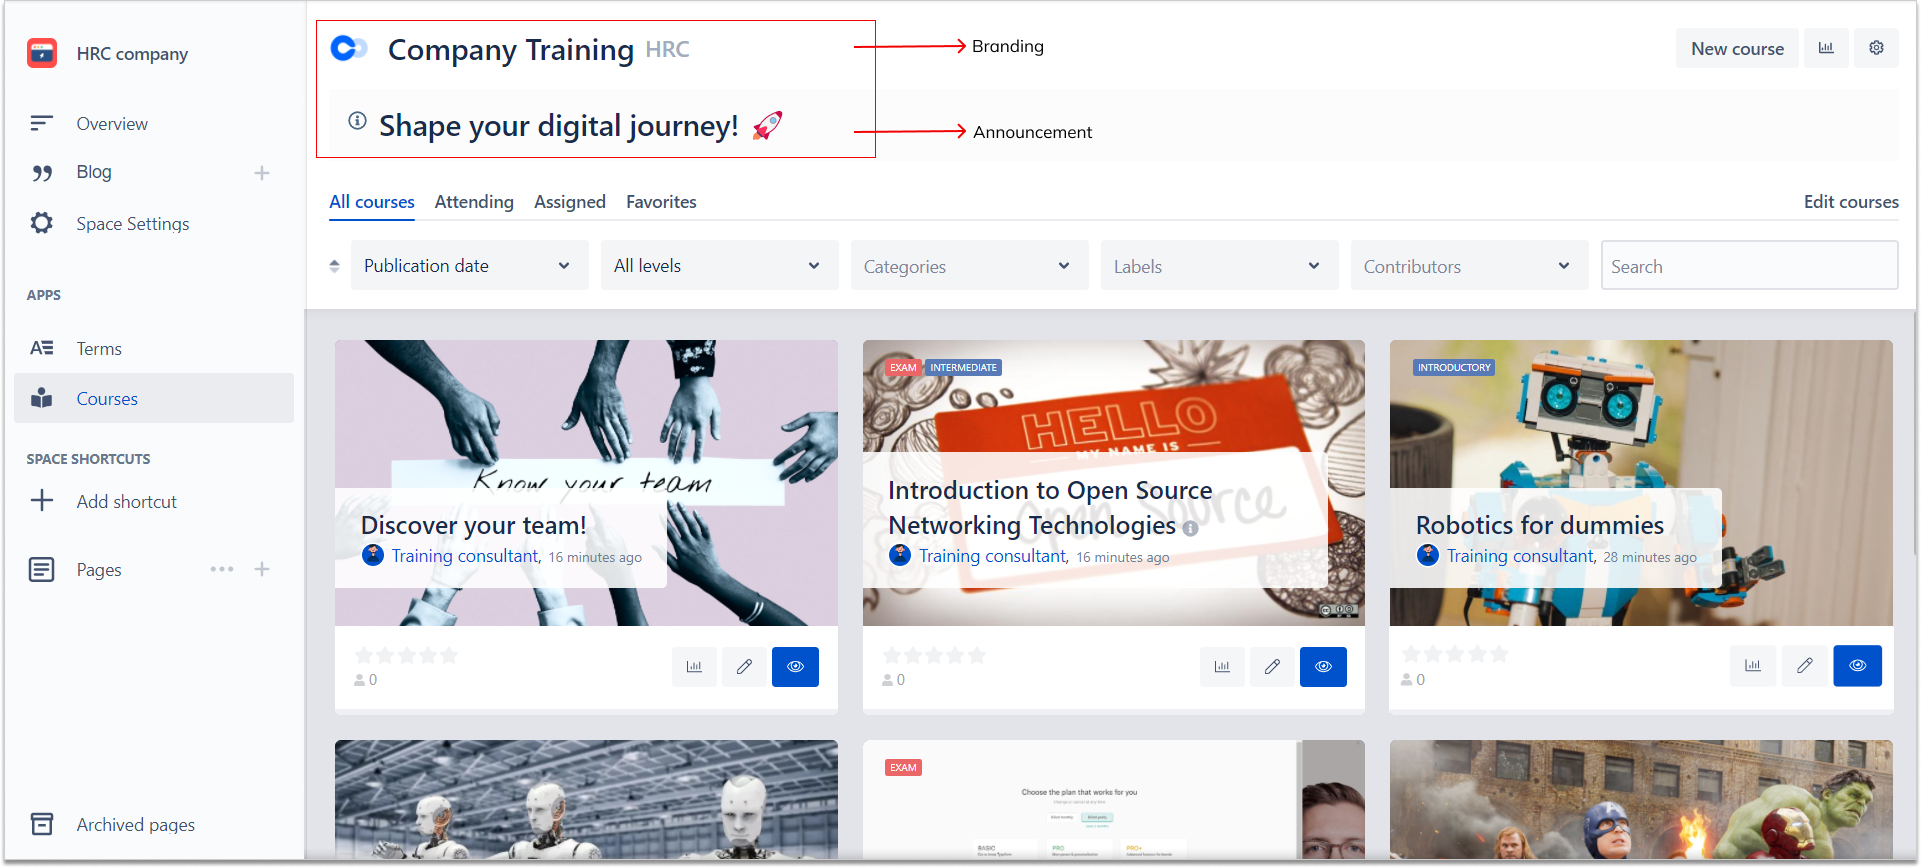
The space now should be visible in the company’s instance like below with the ability to access the courses in Confluence space’ sidebar:
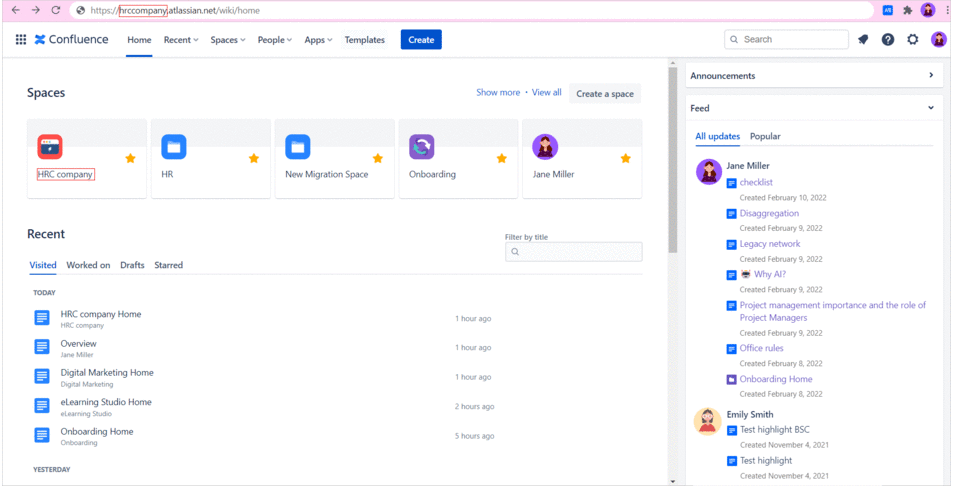
You may question why the course creator’s name changed to Consulting Administrator (Unlicensed). That’s because the consultant is not a licensed Confluence user in the company instance, so his/her image and name will not appear.
Smart Courses for Confluence will also keep the same branding and announcement created in the space in the first place since now the app supports catalog configuration per space.