Making better documentation in Confluence with Smart Terms & Smart Images
Confluence is one of the most potent platforms for organizing and sharing knowledge. But let’s face it, its excellent documentation is more than just text on a page. It needs to be clear, accessible, and engaging for every type of reader. This is where Smart Terms for Confluence and Smart Images for Confluence can work together to transform static pages into interactive, user-friendly resources that everyone in your team can understand no matter their role, language, or preferred learning style.
TL; DR
Even well‑written Confluence pages can leave readers confused. Common issues are inconsistent terminology, multiple languages in a global team, and a lack of visuals. Begin by organizing content in a dedicated space, use templates and macros (table of contents, panels, anchors) to structure pages, draft collaboratively, and take advantage of built‑in versioning and notifications.
Smart Terms is a glossary tool that lets you define, standardize, and translate key terms across Confluence. It highlights terms automatically on pages and displays rich terms popups with definitions, synonyms, and translations. This central glossary ensures consistent terminology and multilingual support.
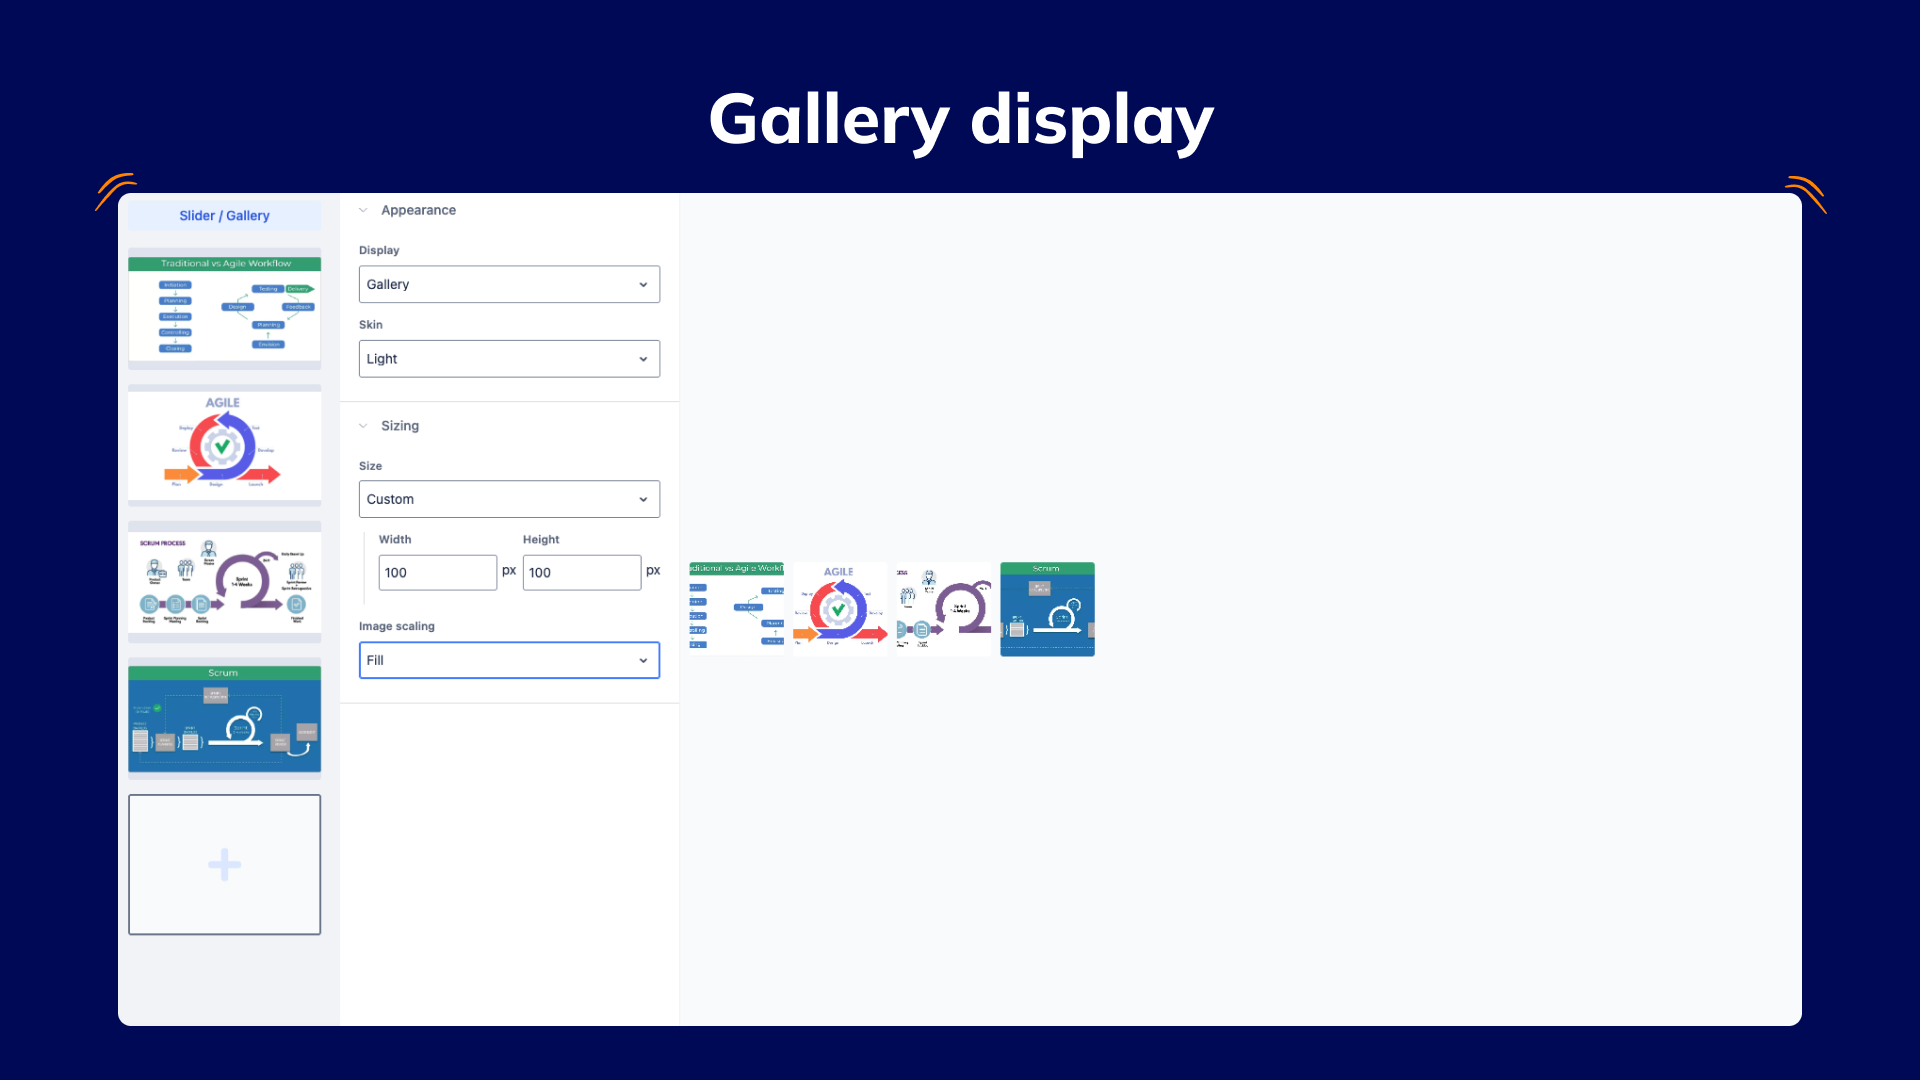
Smart Images enhances visual content by letting you add interactive hotspots, annotations, image sliders, and galleries. Annotated visuals can link to glossary entries or other resources, making complex diagrams intuitive.
To use both effectively: list essential terms, acronyms, and visuals; create a glossary in Smart Terms with translations and auto‑highlighting; upload and annotate images with Smart Images; then embed glossary terms and annotated diagrams throughout your documentation.
The combined approach, consistent terminology via Smart Terms and interactive visuals via Smart Images, keeps documentation clear, accessible, and engaging for users of different languages and learning styles.
Why does great documentation often fall short?
Even the most well-written Confluence pages can leave readers confused or disengaged. Common challenges include:
- Inconsistent terminology: Different authors may use different terms for the same thing, making content more challenging to follow.
- Language barriers: Teams spread across countries often need documentation in more than one language.
- Lack of visuals: Complex processes are hard to understand without visuals.
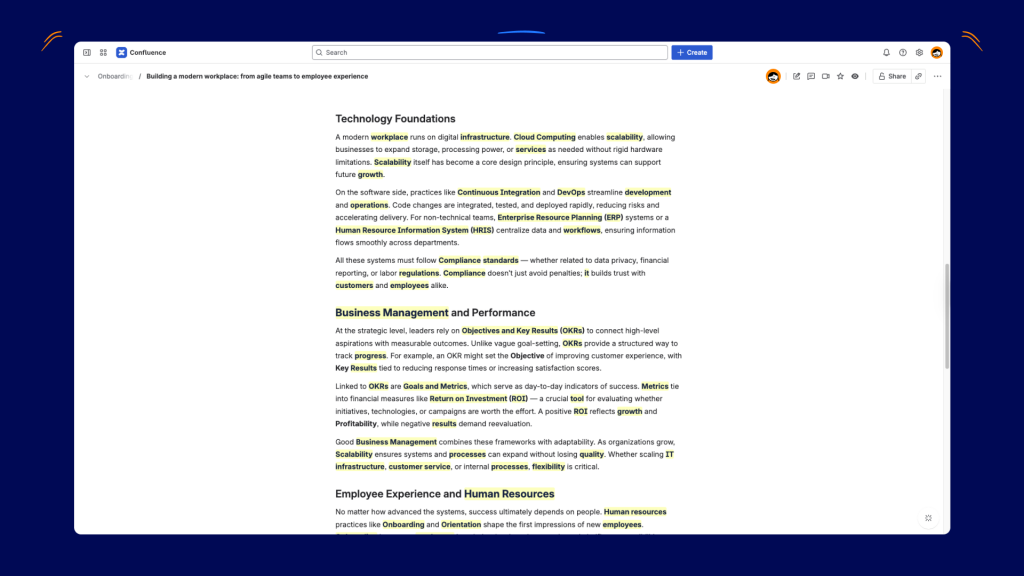
Creating well-structured documentation in Confluence
To document effectively in Confluence, start by organizing your content in a dedicated space. For example, create a Knowledge Base space to get a workspace with built-in article templates and a homepage that uses search and label macros. Within the space, maintain a clear hierarchy and tagging: label each page with descriptive topics so the homepage and macros can automatically group related content. Also, define page templates so every documentation page follows a consistent layout (sections, headings, formatting).
Use Confluence’s formatting and macros.
Write your pages using Confluence’s native formatting tools. For clarity, break content into headings, bullet or numbered lists, and sections. Then add built-in macros to aid navigation.
For example, insert a Table of Contents macro at the top of any long page, and it will automatically list links to all the headings on that page.
Use Info, Tip, or Warning panels to highlight key notes or cautions within your text. You can also use the Anchor macro to create named bookmarks (e.g. a “Back to top” link) that you can link to from anywhere in the document. These built-in features make your documentation more user-friendly and easy to scan.
Collaborate on drafts
Use Confluence’s draft-and-review workflow to polish content before publishing. When you create a new page, immediately restrict its permissions (e.g., visible only to your team) to keep it private while drafting. Then write your documentation and share the page with colleagues for feedback: reviewers can leave inline comments (by highlighting text) or suggest edits directly on the page. This keeps feedback tied to the correct context. After revisions, remove restrictions and delete any placeholder comments so the final version is visible to all intended readers.
Track versions and updates
Confluence automatically versions every saved change. Encourage team members to watch key pages or the entire documentation space. Confluence will then notify them whenever those pages are edited. To see exactly what changed, use the Page History feature. The history view lists all past versions with dates and authors; you can compare any two versions or restore an older version if needed. This ensures you can track edits or recover content if something was changed incorrectly.
- Watch pages/spaces for change notifications.
- Use Page History to compare or revert versions.
Smart Terms vs Atlassian AI definitions
When it comes to defining unfamiliar terms, Confluence offers two approaches. Atlassian Intelligence’s “Define” feature lets you highlight a word on any page and click Define to get an AI-generated explanation right there. This provides instant, context-based definitions without any setup.
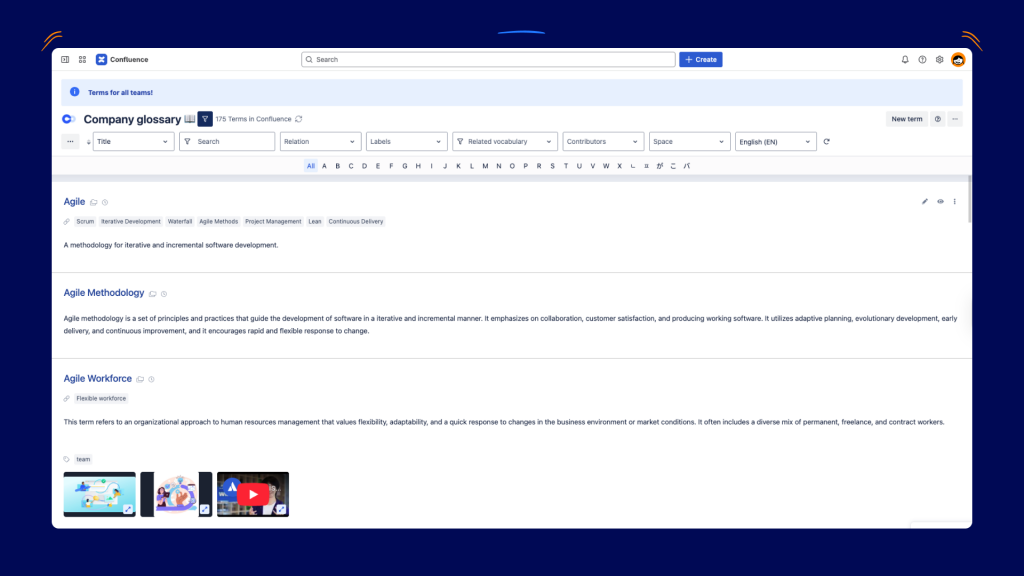
By contrast, Smart Terms is a glossary app: admins create and manage a permanent list of term definitions (with synonyms, images, translations, etc.), and the app automatically highlights those terms across your Confluence pages. Smart Terms also allows control over where and when to highlight terms, and provides a centralized glossary your team can search and explore.
How Smart Terms and Smart Images work together in Confluence?
- Smart Terms ensures your text is understandable, consistent, and multilingual.
- Smart Images makes your visuals interactive, detailed, and easy to explore.
Define and standardize your terminology with Smart Terms
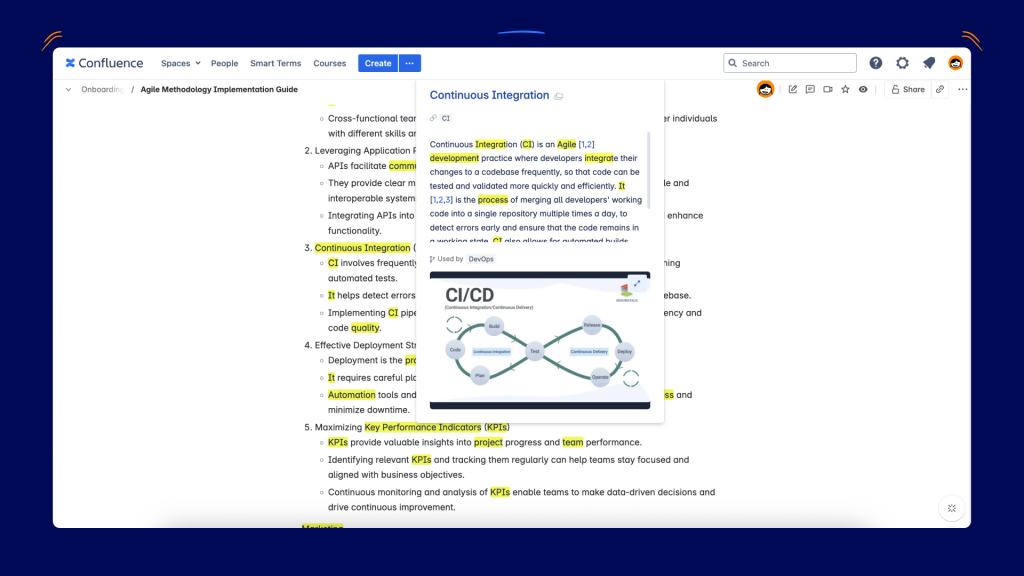
Smart Terms allows you to build and maintain a glossary inside Confluence. Once a term is added, it can automatically appear highlighted across your pages, with definitions and translations available in a highlight popup.
Key features that make it essential for documentation:
- Auto-highlighting: Your terms are automatically detected and highlighted across Confluence pages. You can also enrich them with related vocabulary. For example, if you add Artificial Intelligence (AI) to your glossary, both “AI” and “Artificial Intelligence” will be highlighted and linked back to the exact definition, ensuring no one gets lost in acronyms.
- Highlight popup: Hover over (click on) a term to instantly see its definition without leaving the page. Unlike Atlassian’s built-in Smart Definitions, Smart Terms tooltips can include rich details: a short description, synonyms, and translations, giving your readers real context instead of just a simple dictionary-like definition.
- Multilingual support: Provide translations so every team member can read in their preferred language.
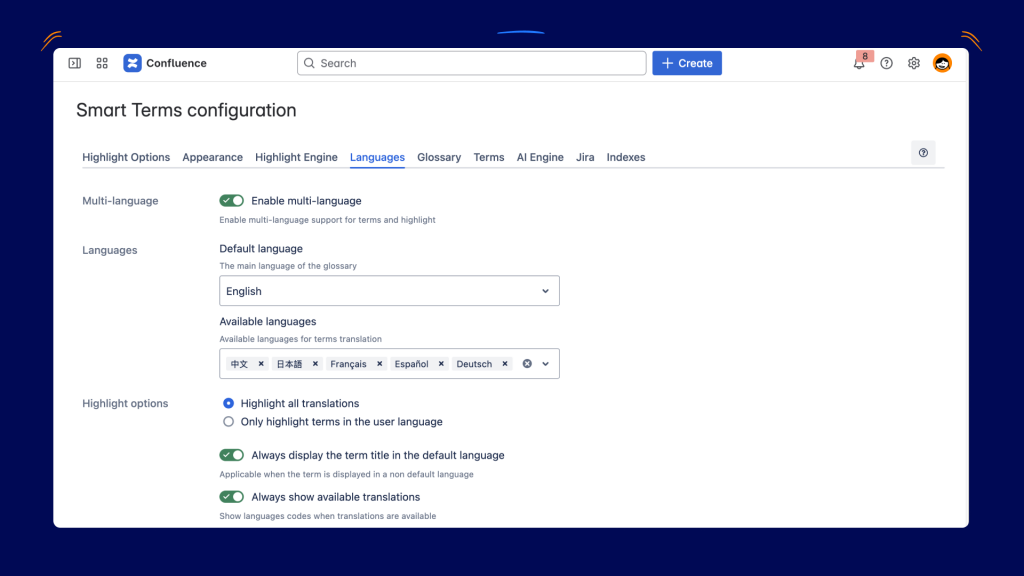
- Centralized glossary: Update once, and changes appear everywhere. Even better, Smart Terms gives you complete control over where and when terms are highlighted. You can choose to highlight terms globally across your workspace, or limit them to specific spaces, pages, or even sections, making the highlight engine both powerful and flexible.
Make visuals better with Smart Images.
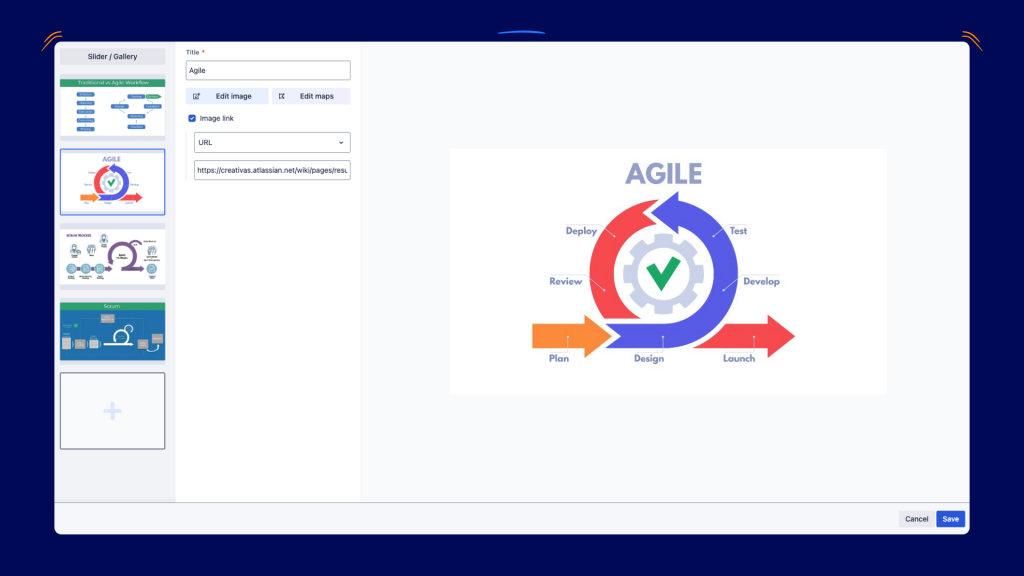
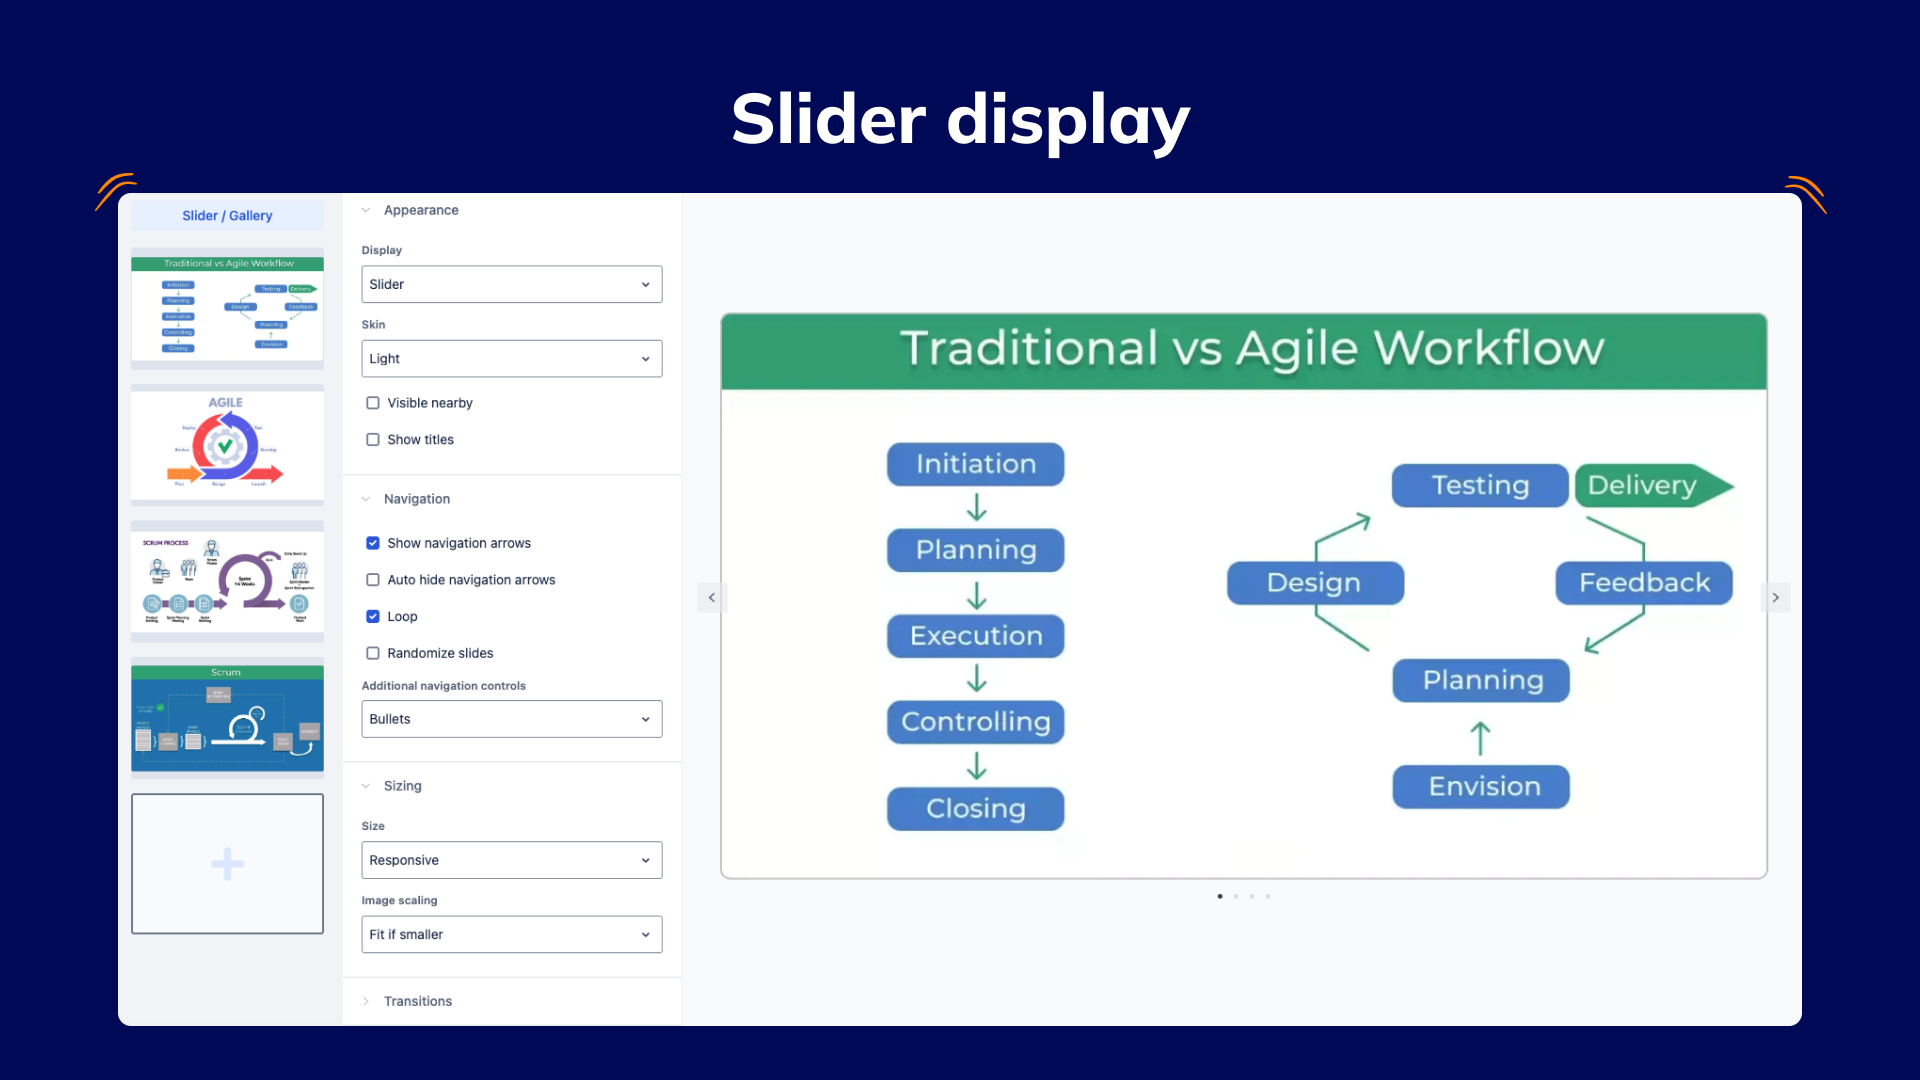
Smart Images lets you add interactive elements to images, diagrams, and mockups inside Confluence. You can guide readers through complex visuals without needing long paragraphs of explanation.
Key features that improve documentation:
- Image maps: Clickable points on images that display text, links, or media.
- Image annotations: Label different areas for clarity.
- Multiple image layouts: Showcase your visuals in different ways, such as image sliders for step-by-step walkthroughs or galleries to group related diagrams and screenshots. You can also create clickable image maps, where product mockups or diagrams become interactive and guide readers through each component.
Steps to use both apps
Here’s how to combine the two apps effectively in your documentation workflow:
- Identify key concepts & visuals
- List essential terms, acronyms, and process names.
- Select diagrams, UI screenshots, or workflow charts that support your content.
- Build your glossary in Smart Terms
- Add definitions, synonyms, and translations.
- Enable auto-highlighting for instant in-page tooltips.
- Upload and annotate images in Smart Images
- Place hotspots to explain each part of your diagram.
- Link hotspots to glossary terms, related pages, or additional resources.
- Embed both in your Confluence page
- Glossary terms appear naturally in your text.
- Annotated visuals break up content and make it interactive.

Use Case: Sofia’s global team
Sofia is a team lead at a multinational tech company. Her Confluence workspace is full of documentation for product development, onboarding, and support. But her team faces three challenges:
- Diverse languages: Some members prefer English, others work in French, Spanish, or Japanese.
- Different learning styles: Developers want detailed technical definitions, while designers prefer diagrams and visuals.
- Inconsistent terms: New hires keep asking what internal acronyms mean.
Here’s how Sofia solved it with Smart Terms and Smart Images:
- She created a central glossary in Smart Terms with translations for each key product term. Now, when anyone hovers over a term, they instantly see its definition in their preferred language and even some visuals.
- She replaced static diagrams with Smart Images. For example, her product architecture diagram now has clickable hotspots showing component details and linking to relevant Confluence pages.
- When onboarding new hires, they can explore documentation without needing to ask. Sofia tooltips and annotated visuals explain everything in context.
The result?
Faster onboarding, fewer repeated questions, and higher documentation adoption across her global team.
ConfluenceDocumentationGlossaryLearningOnboarding