Smart Terms for Confluence highlight configuration
Our recent blog post about Smart Terms for Confluence emphasized the different highlight options for the cloud version: the modal highlighter, Smart Terms browser extension, and the macro. In this blog, we’re focusing on the configuration of the highlight option.
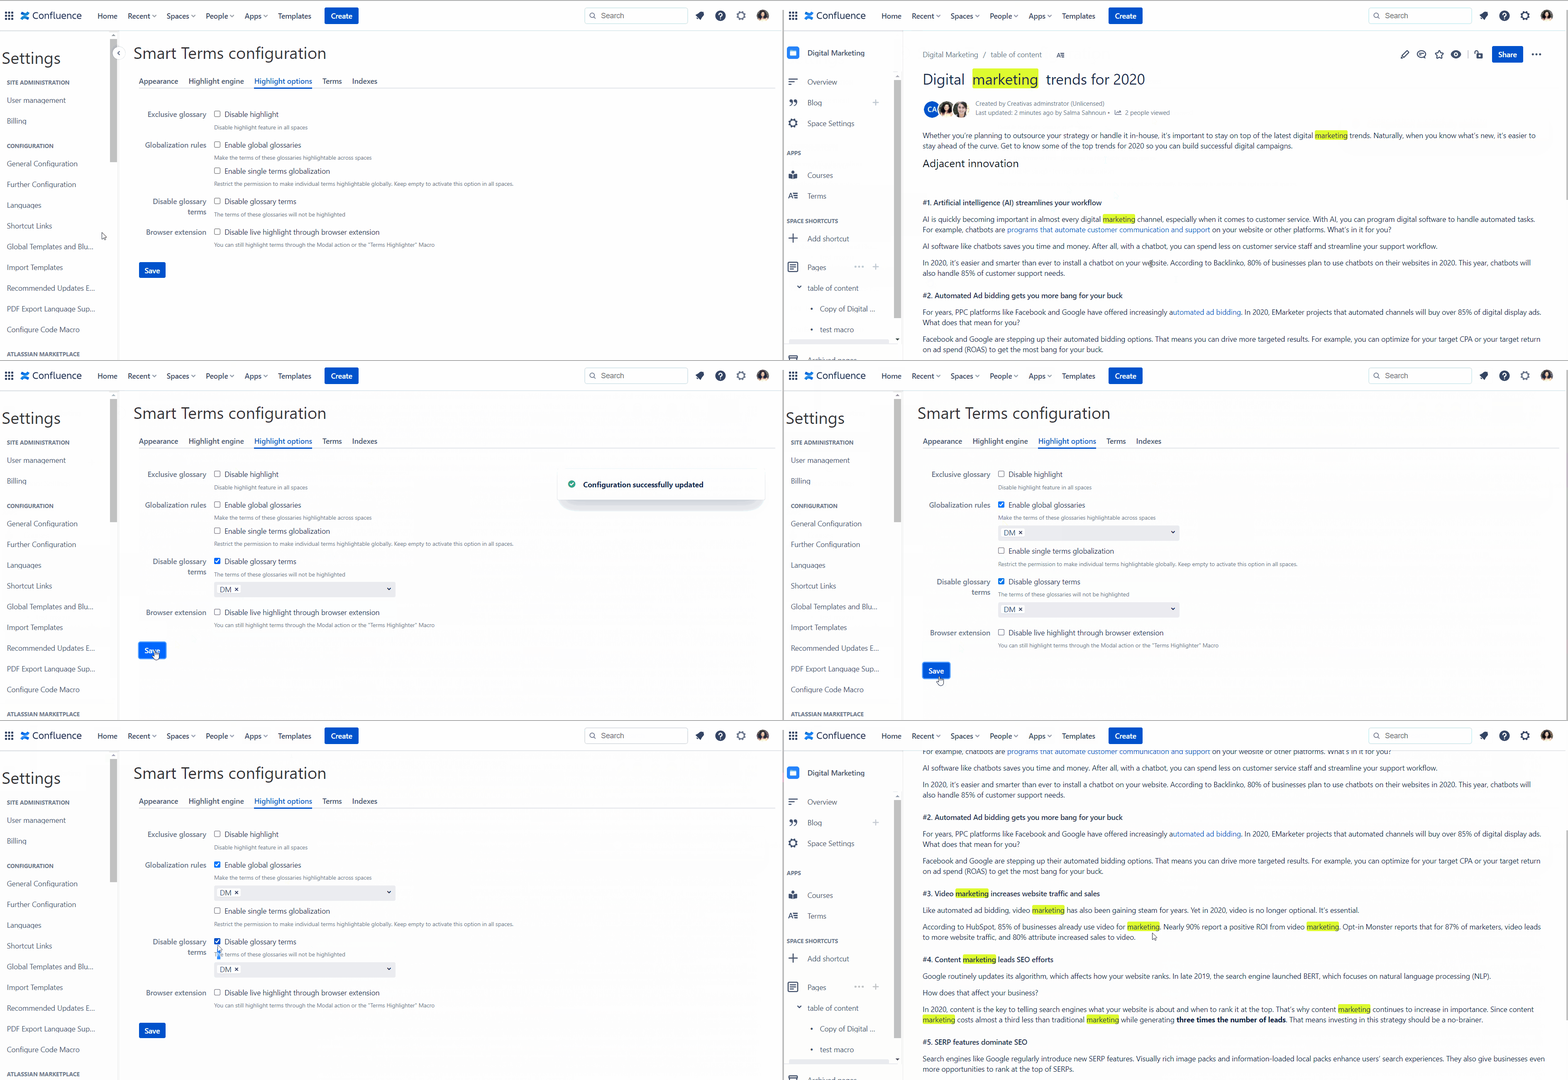
Smart Terms highlight feature has 5 significant configurations:
- Disable highlight
- Enable global glossaries
- Enable single terms globalization
- Disable glossary terms
- Disable live highlight through browser extension
In this blog post, we will explain each configuration and its functionality to help you better understand the different highlight options of Smart Terms for Confluence and establish an easy-to-use enterprise glossary!
You use markers to highlight terms and important information in your notebook to make sure you refer to them the next time or keep them a priority. This is as important as the highlighter in Smart Terms for Confluence. However, it’s not always the case. Not everyone is interested in marking terms, the same goes for the highlight option.
Your use case differs you from another user in adjusting the configuration in Smart Terms for Confluence. That’s why we made sure we provided you with every option possible in this situation so that we satisfy all your needs.
The highlight configuration can be done globally or per space.
Globally
1/ Disable highlight
Click on settings in the confluence menu and search for Smart Terms configuration. Go to Highlight options and click on disable highlight. This will disable all highlight options of all the terms in all glossaries.
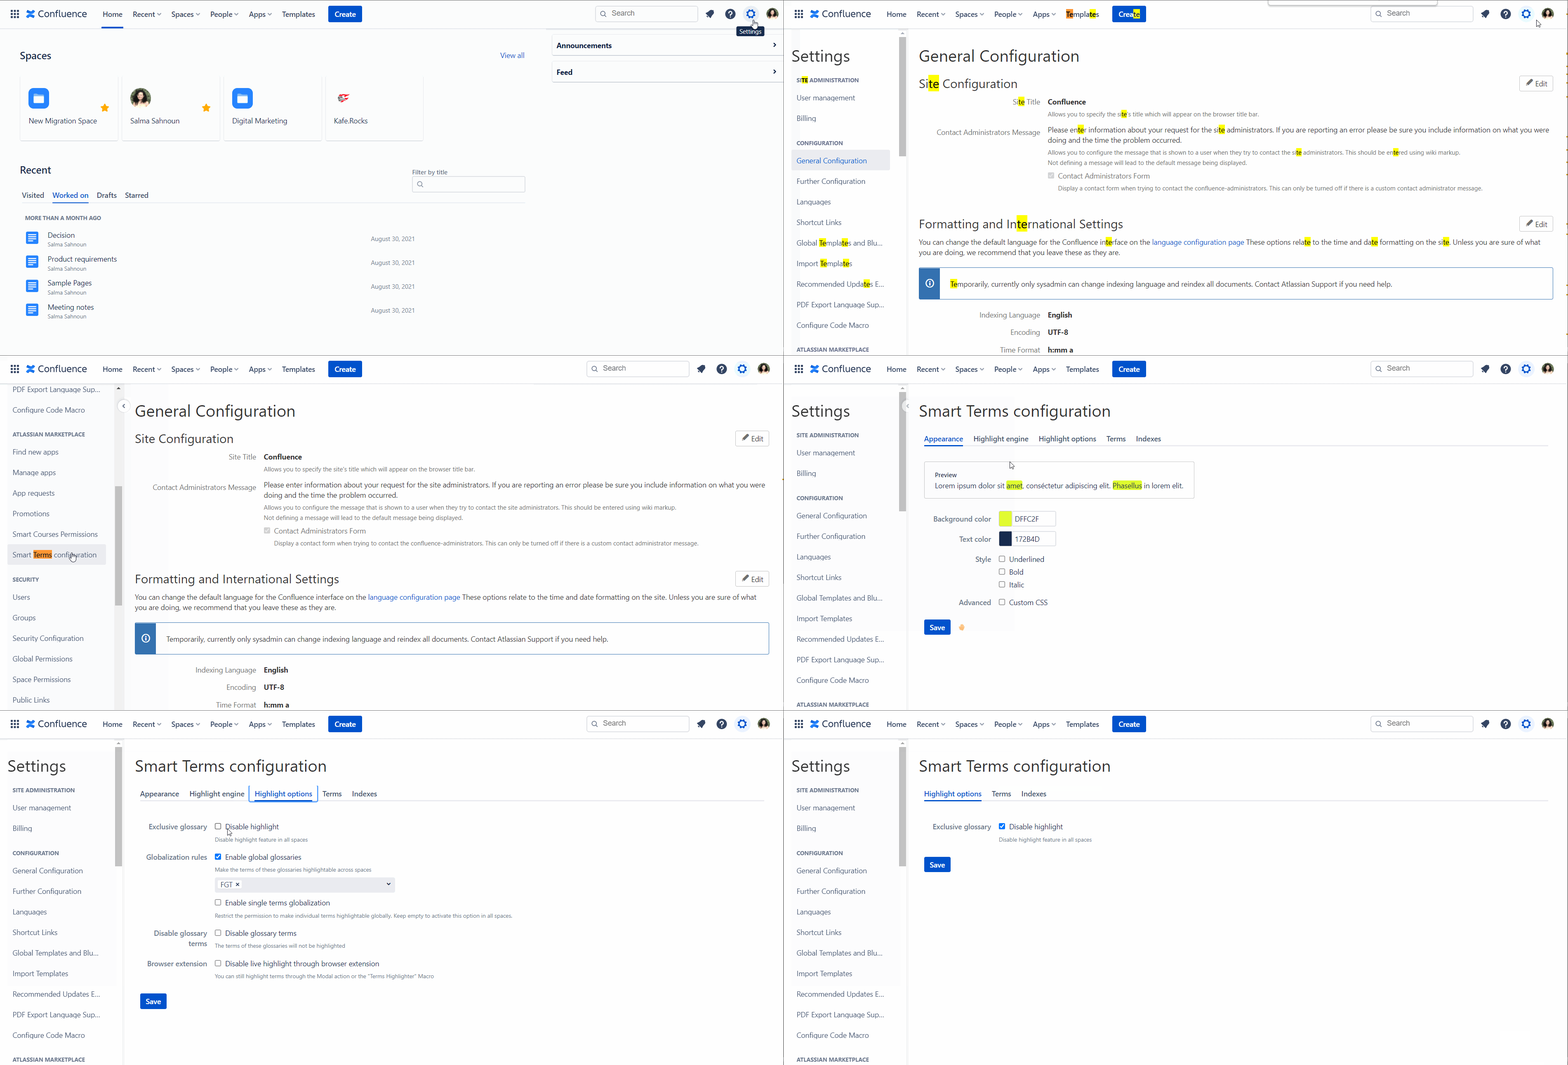
2/ Enable global glossaries
Enable global glossaries will allow the terms of the glossaries you choose to be highlightable across all spaces. In other words, you just need to add the concerned spaces to highlight all the terms of those glossaries globally.
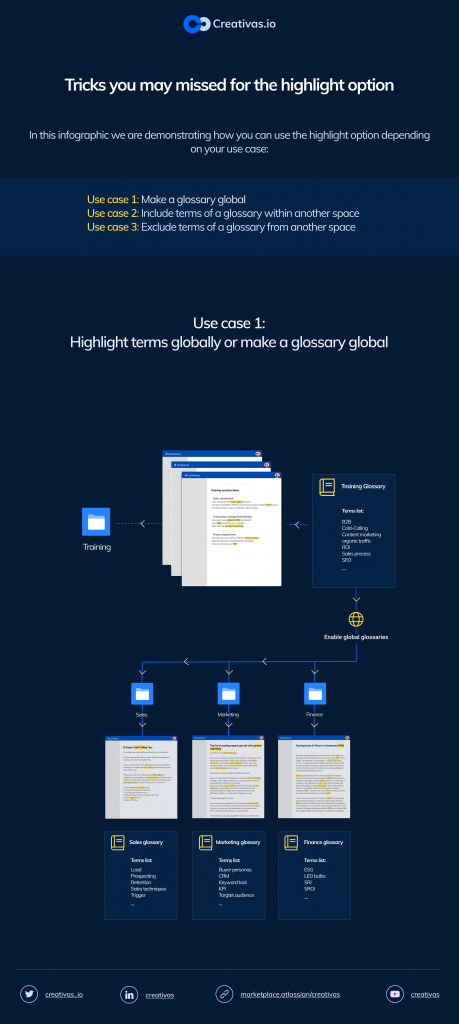
3/ Enable single terms globalization
Enable single terms globalization is more specific. Tick it and leave it empty; it will be activated in all spaces. In other words, an option labeled as “Highlight globally” will be added for all terms’ editor in all spaces and will allow you to choose to highlight per term. While, if you type specific spaces, only the terms of those spaces will have the option “Highlight globally,” and you get to choose per term.
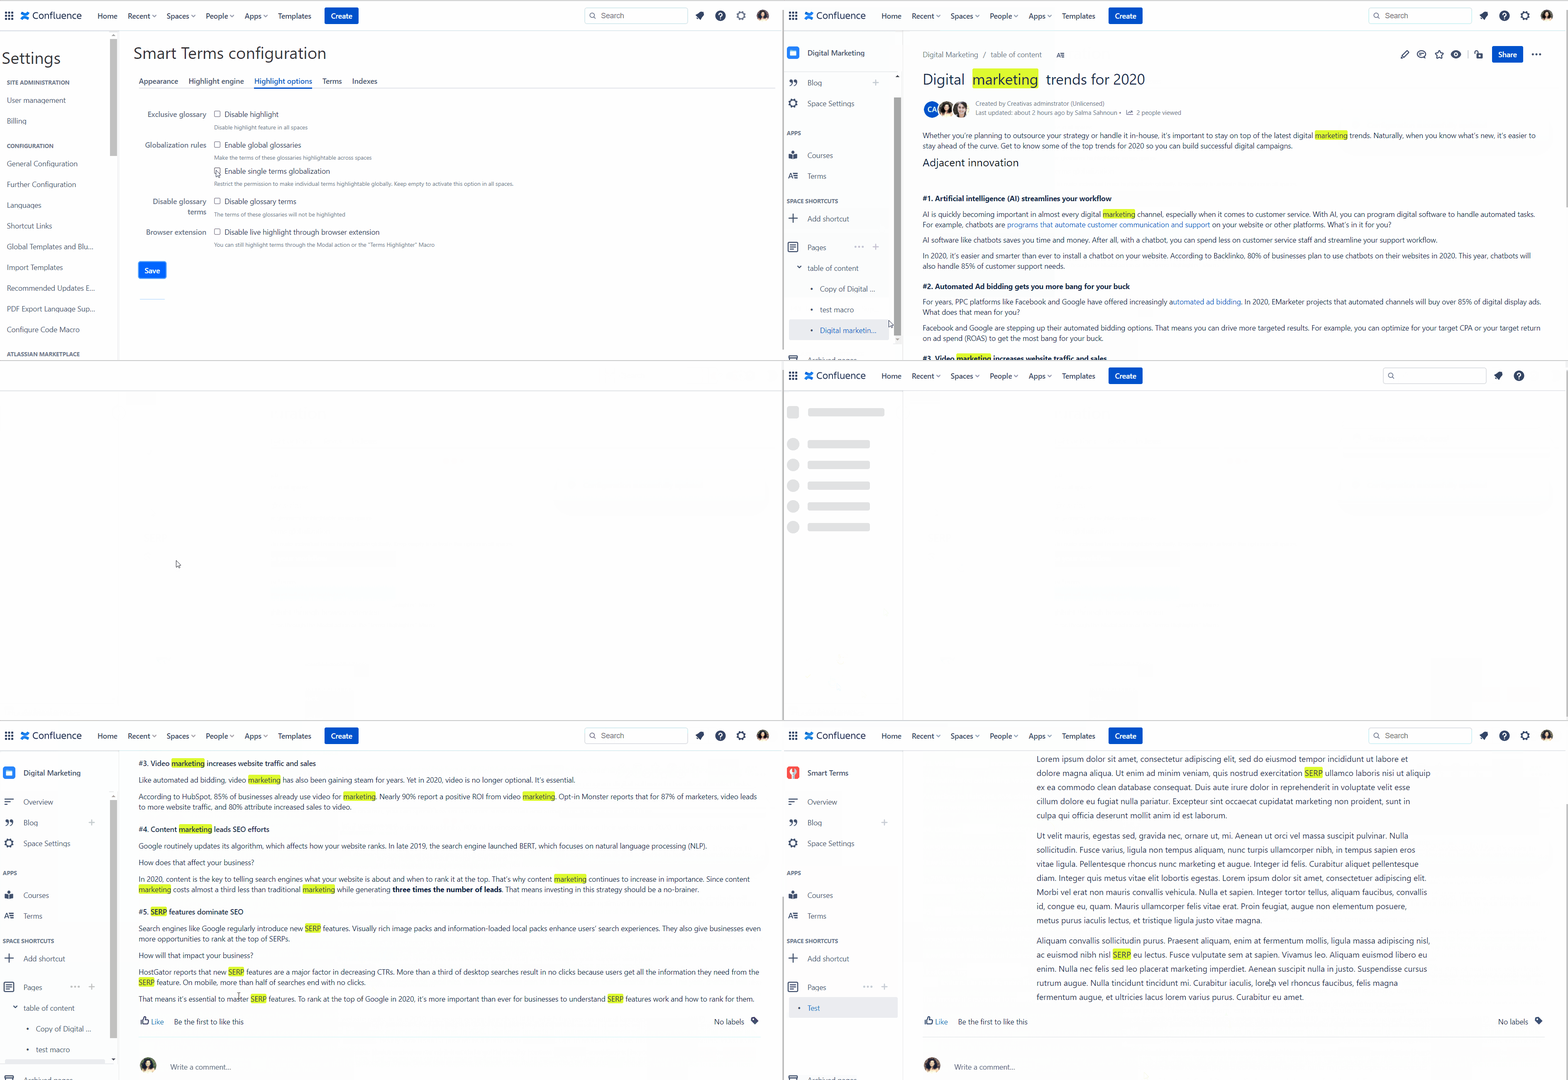
4/ Disable glossary terms
If you want to disable specific terms existing in specific spaces, choose disable glossary terms and type which spaces are concerned.
This option can work simultaneously with enable global glossaries and enable single terms globalization under the condition of not selecting the same spaces.
For example, you’re enabling the marketing glossary to be highlighted globally and enabling specific terms of the sales glossary to be highlighted through the option of enable single term globalization. Still, at the same time, you want to disable all the terms of the IT glossary from being highlighted anywhere.
5/ Disable live highlight through browser extension
This feature is self-explanatory. You disable the live highlight through browser extension, but you can still highlight terms through the Terms Highlighter macro and the modal highlighter.
You can refer to “Explore Smart Terms highlight feature” blog post to understand the previously mentioned alternatives better.
Per Space
Go to space settings, choose App links, and click on Smart Terms. Select Highlight options and there you’ll have what you need to configure your space settings.
The first option is “disable highlight” which will disable the highlight feature only in the space you’re in.
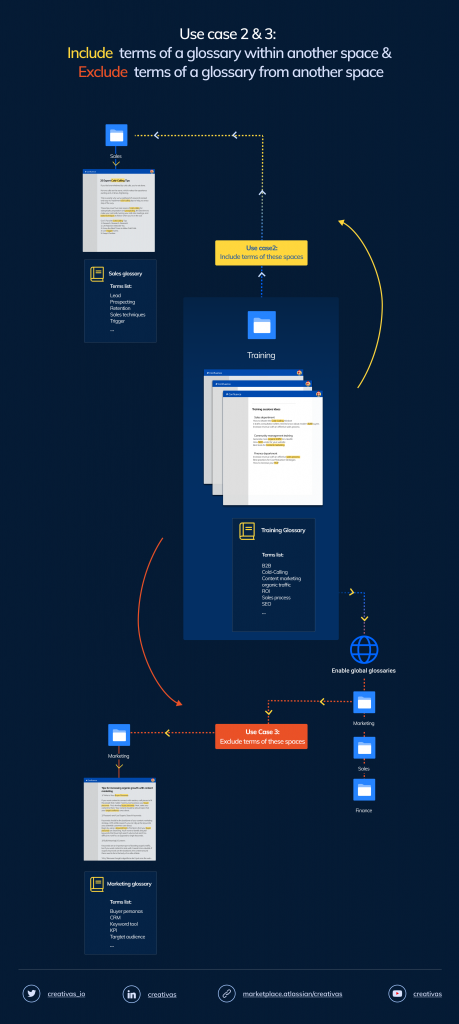
The second option is about including and excluding terms from specific glossaries to be highlighted in the space you’re setting.
